Default Template
Getting Started
You can select the style you want to design for: Cartoon avatar (CRT) or Realistic avatar (PHR).
The templates have different body shape and rig, make sure to select the style you want.
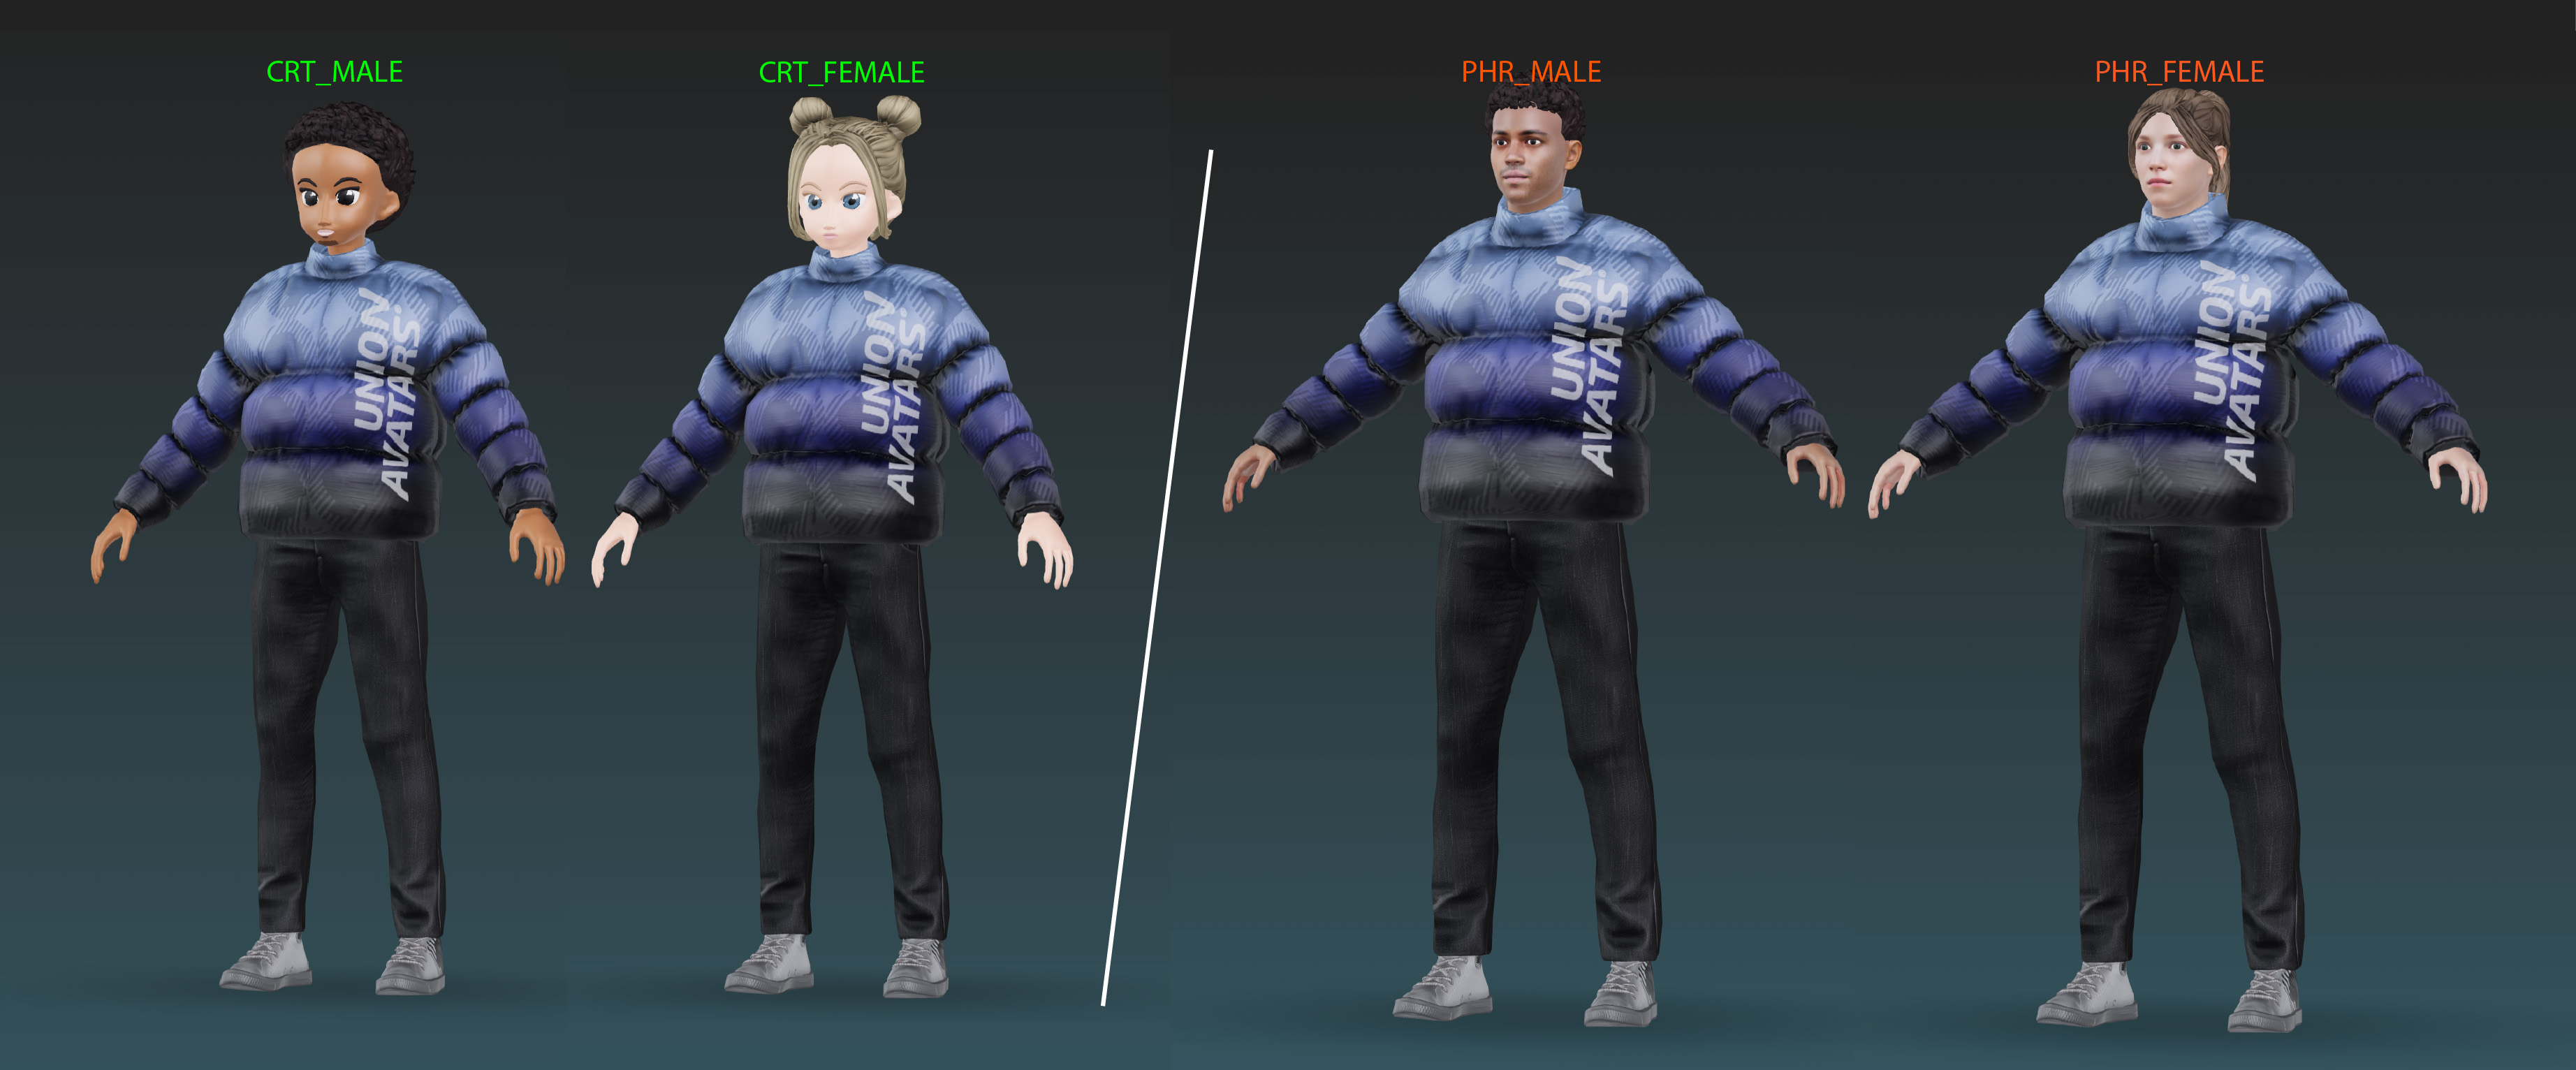
STEP 1: Choose a default template for Realistic or Cartoon style
- CRT Default T-shirt / PHR Default T-shirt
- CRT Default Sweatshirt / PHR Default Sweatshirt
- CRT Default Pants / PHR Default Pants
STEP 2: Modify PSD texture file ( texture template is the same for both styles)
STEP 3: Add custome texture to template in Blender
- Download Blender and install it.
Import default template, the GLB file.
Modify your texture in Photoshop, hide the unnecessary layers, and export a JPG file
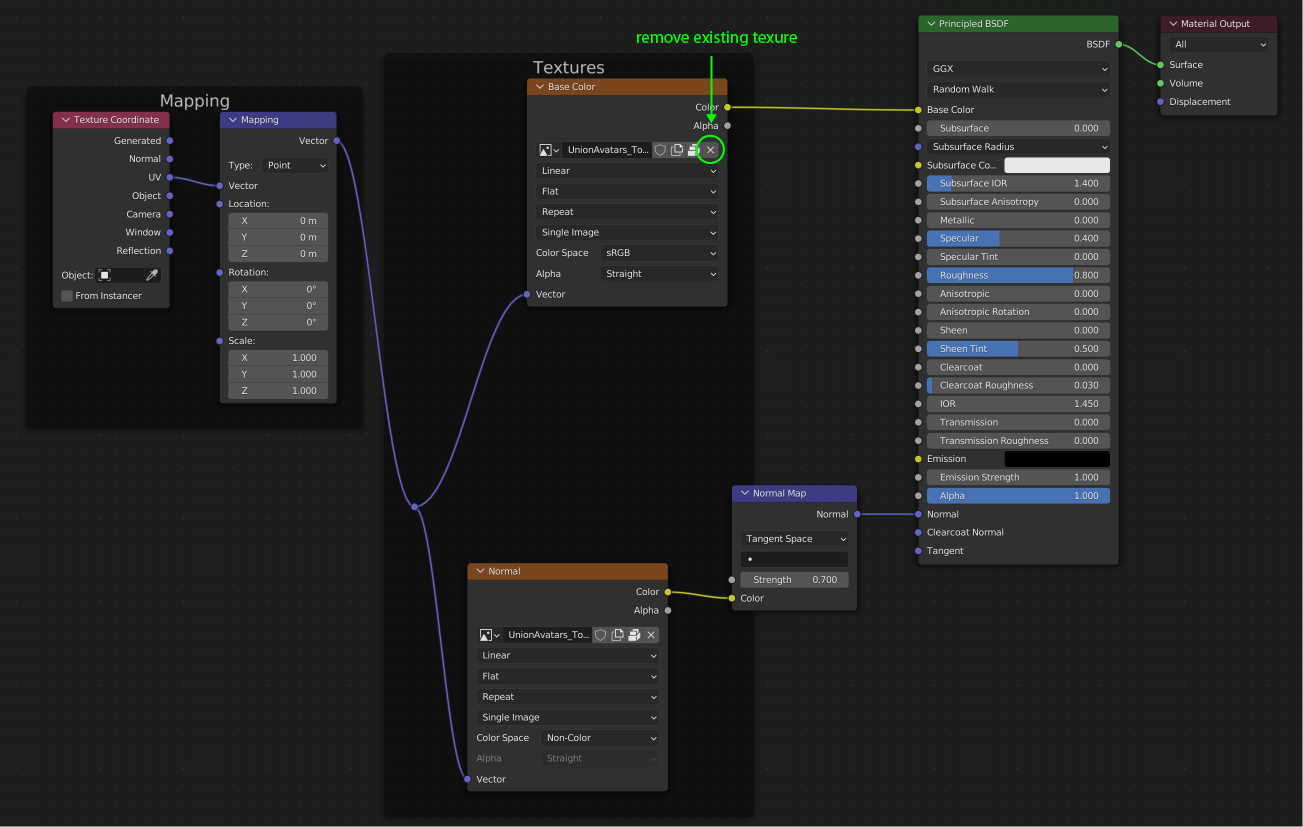
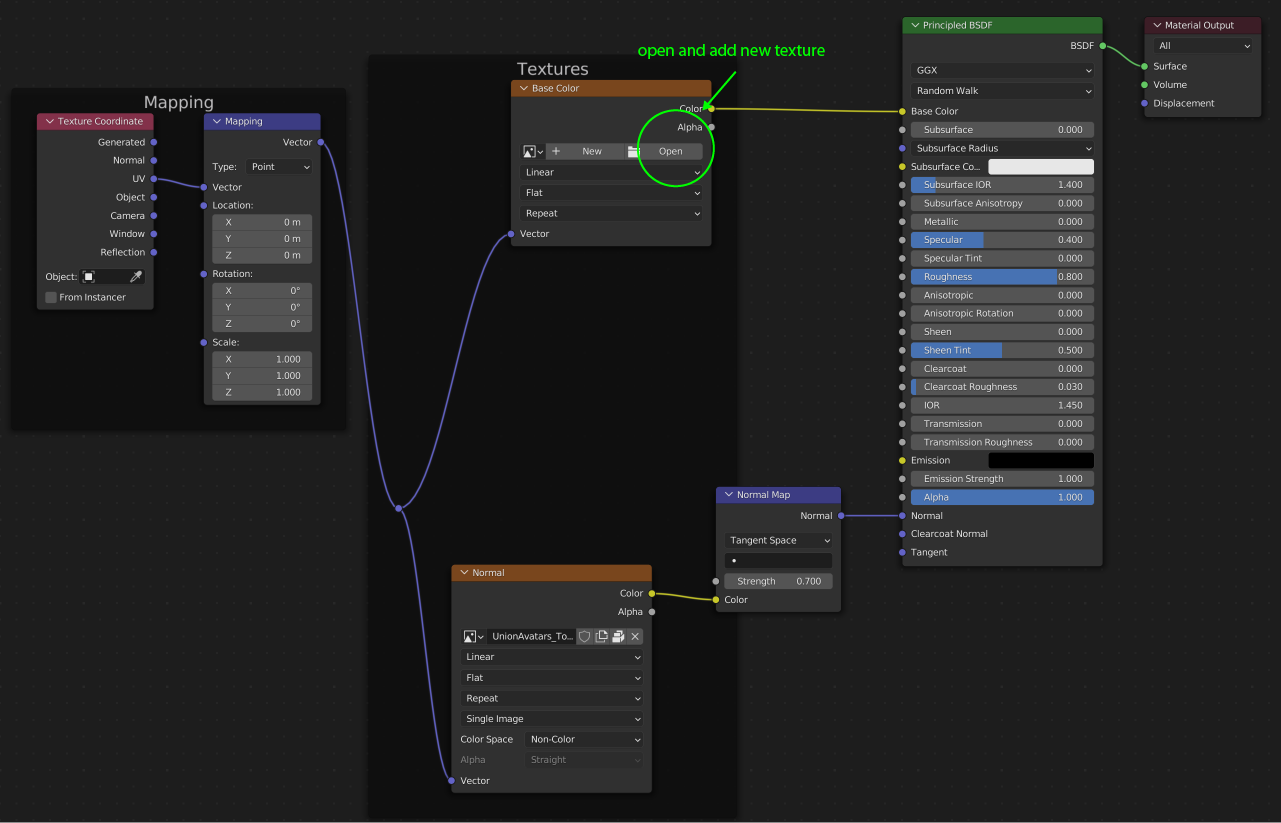
Change Base Color texture in Blender.
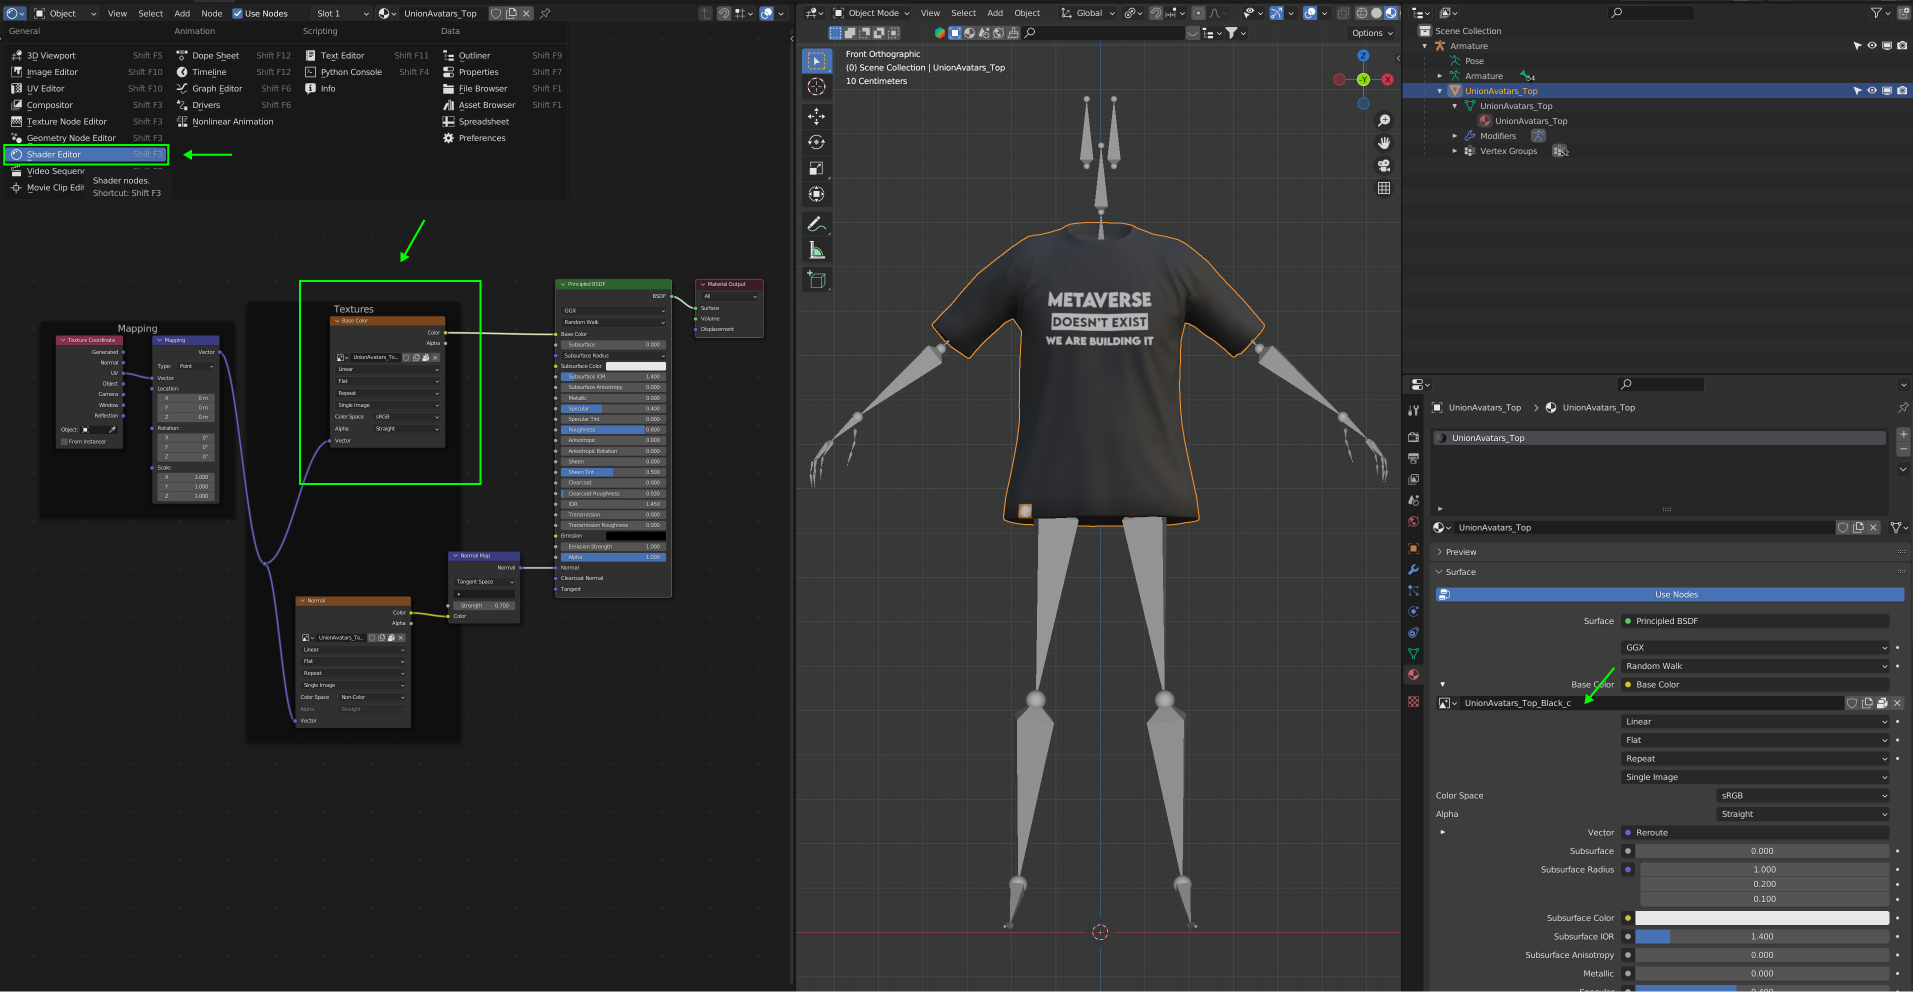
To add your texture:
STEP 4: Prepare your garment for export
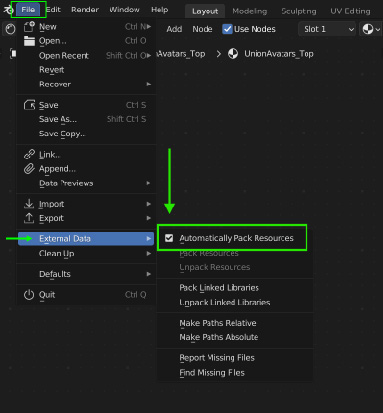
- Before saving your file, inside Blender, go to FILE -> EXTERNAL DATA -> AUTOMATICALLY PACK RESOURCES and make sure to check the box. This will pack the texture from your computer into the Blender file.
Save your Blender file with a custom name: "style_gender_brand_name of default garment_color/other information"
Install the Blender Add-on of Union Avatars to check that your custom design follows the guidelines, and to export your files correctly:
7.1 Check all the visible parts of the body and uncheck the hidden ones.7.2 Next, click on "I have check that the visible body parts are correct"7.3 Click on "Create GLB and JSON file"7.4 Your files will be saved in the same place where you saved the Blender file.7.1 Check all the visible parts of the body and uncheck the hidden ones.7.2 Next, click on "I have check that the visible body parts are correct"7.3 Click on "Create GLB and JSON file"7.4 Your files will be saved in the same place where you saved the Blender file.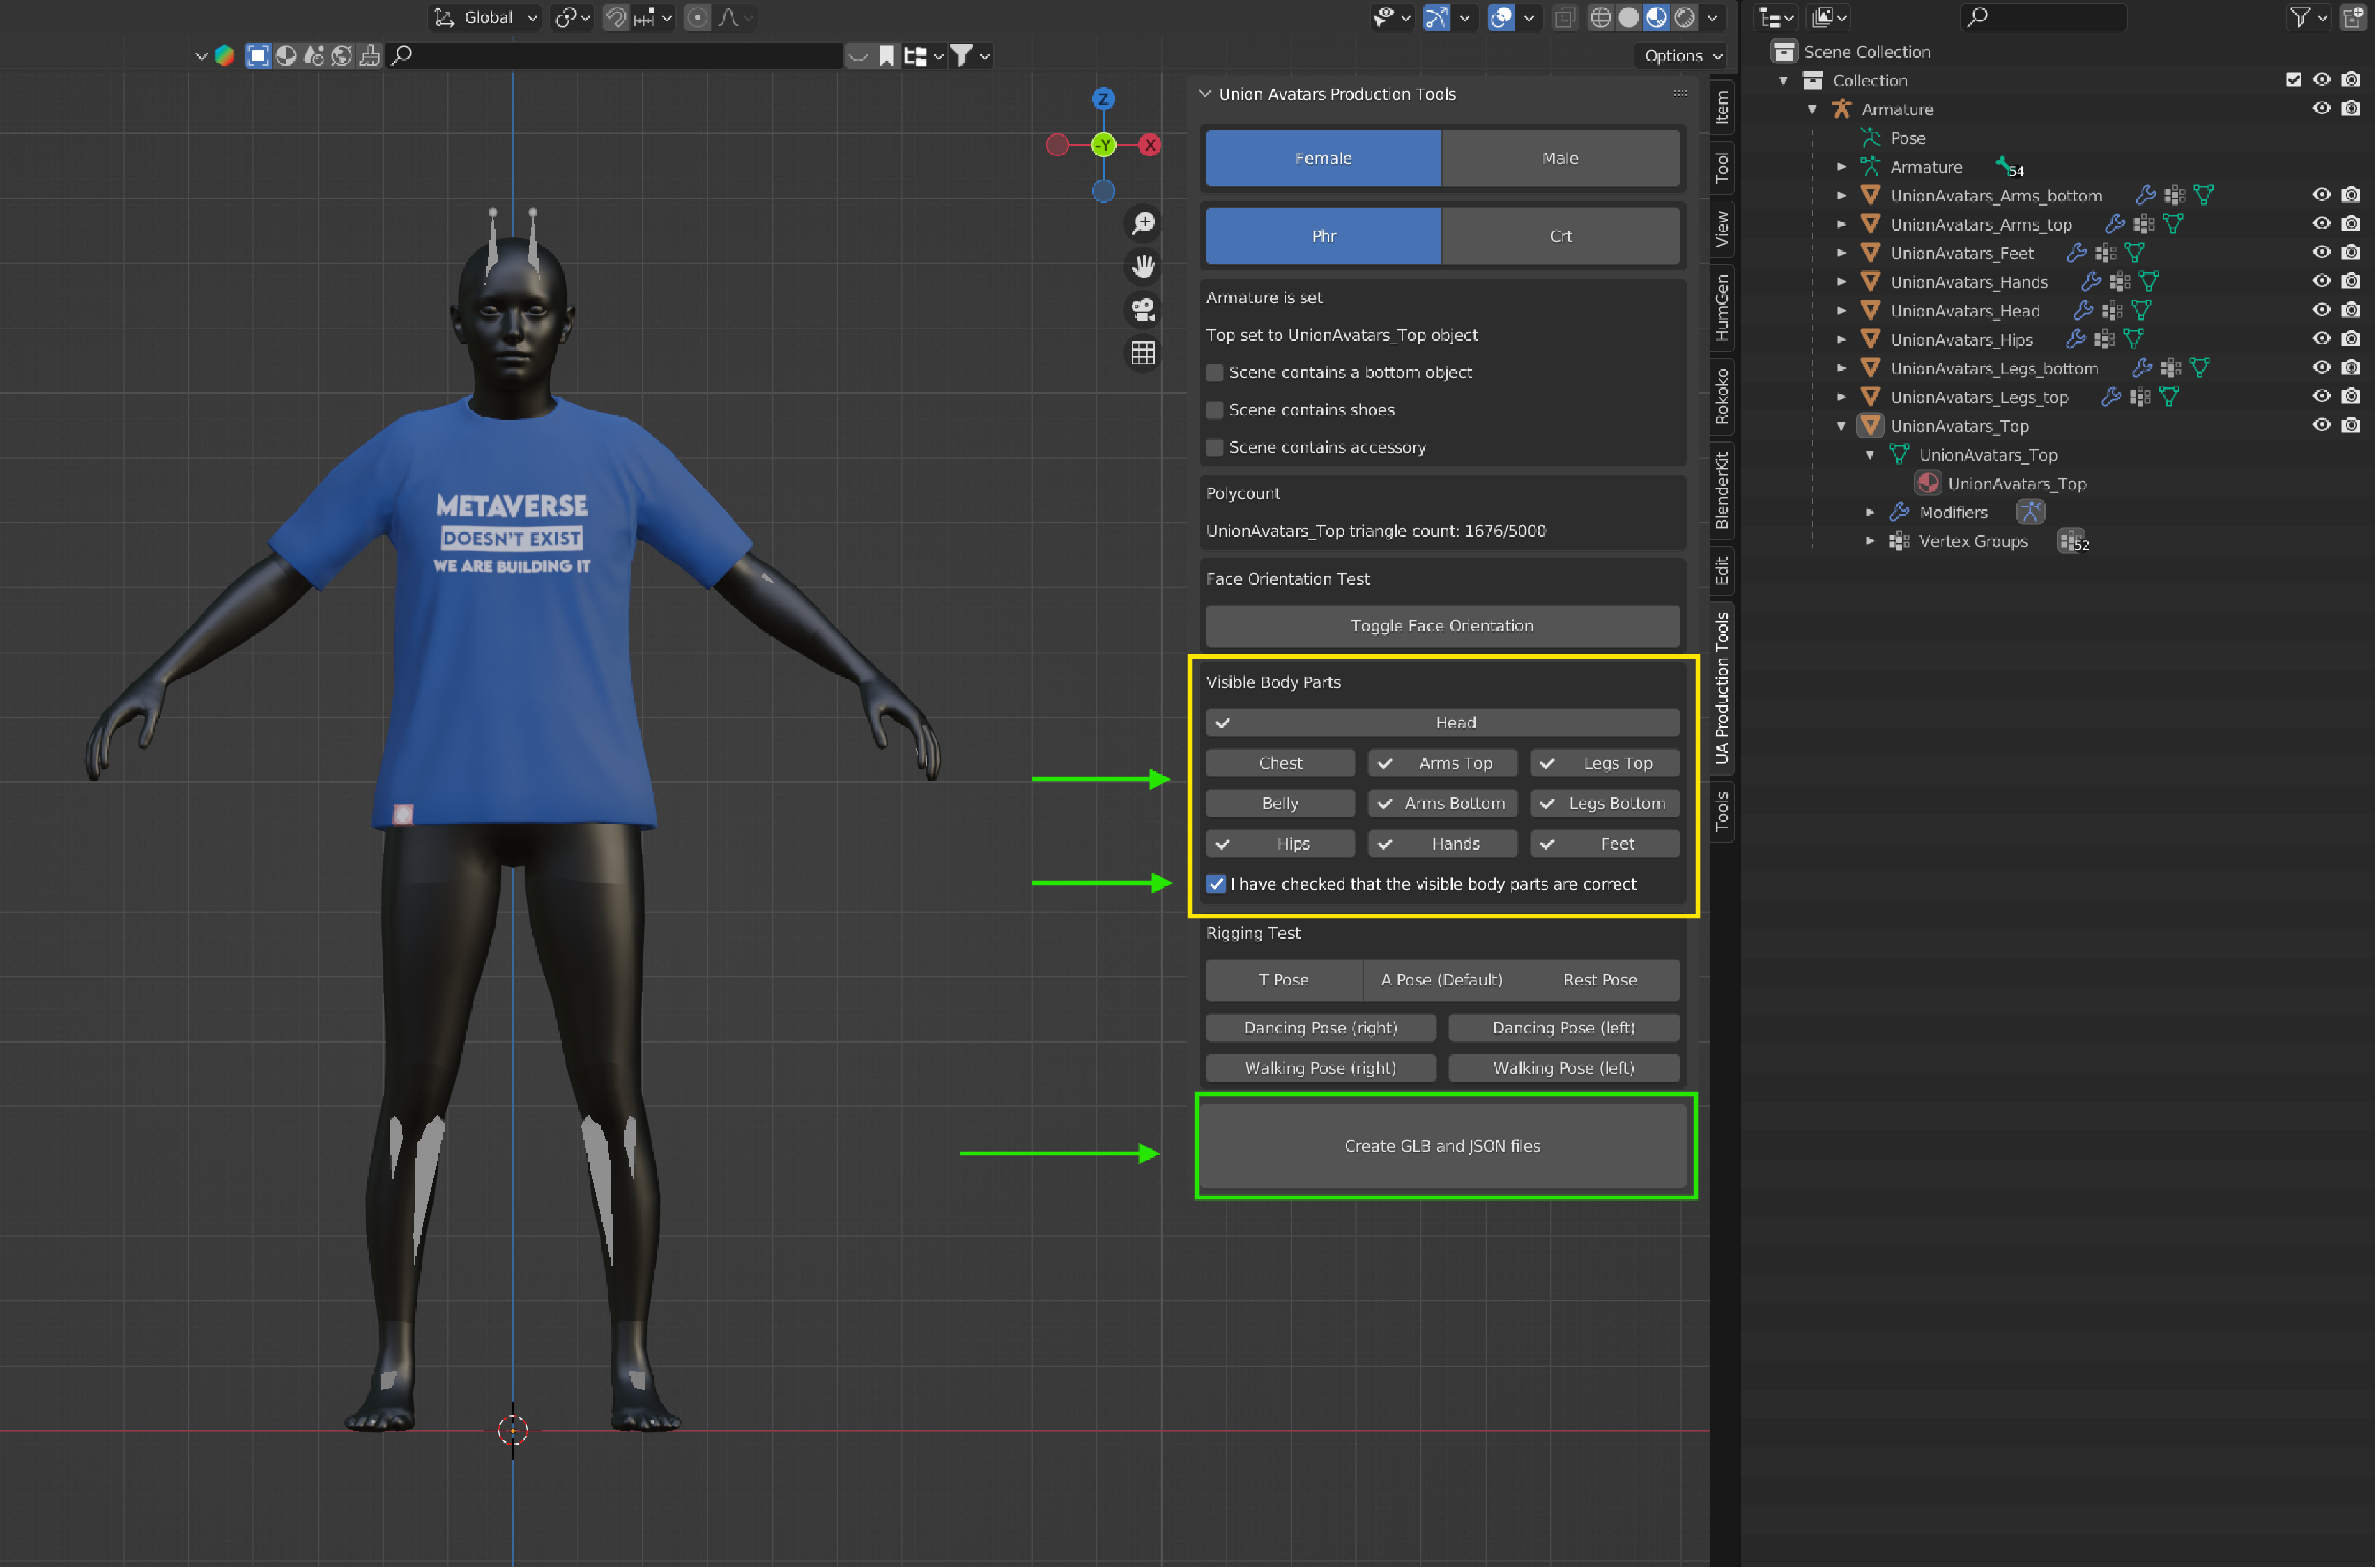
STEP 5: Send your files to Union Avatars
Compress all your Blender files into a ZIP file and submit it through this form for review.
Problems with the form? You can send us a message to techsupport@unionavatars.com